I quickly learned that the input marked "Input A (mono)" and the output marked "Output A (mono)" were the ones that I needed to use in order to make the pedal function the way that I expected it to, but I was eager to bring the pedal in to my next guitar lesson to ask my teacher what the heck was going on.
My teacher informed me that the reason why I needed to use the input and outputs marked "mono" is because my guitar's signal chain was mono. Maybe you've experienced something similar, and maybe this experience, like myself, has led you to investigate what exactly it means to have a mono signal chain, and maybe you're trying to figure out what a stereo signal is and how you can set one up for yourself. If so, well then I'm happy to tell you that this is exactly what I will be getting into in this article right here! Let's begin by clarifying what the word "stereo" can mean when it comes to the wide world of guitar gear.
If I can give the simplest explanation of what makes something stereo vs. what makes something mono, I would say that something mono has only one sound source, and something stereo has two different sound sources. Now, if you don't like that definition then that's ok, I'm not working for Webster's Dictionary or anything like that so you don't have to worry about that definition becoming the law of the land, however I do think it describes the difference between mono and stereo succinctly. To demonstrate, let's look at some mono guitars and compare them with stereo guitars.
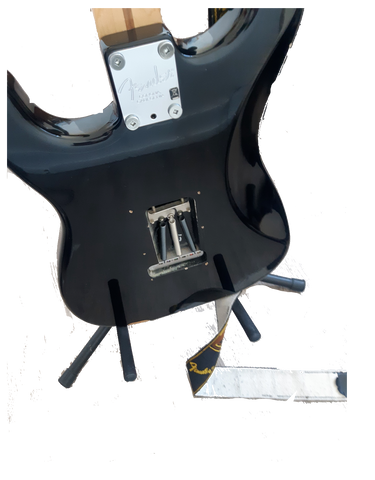
Chances are that if you own a guitar, it is most likely mono. You can tell by counting how many output jacks your guitar has. If it only has one, like most typical fender or gibson style guitars, then it is mono. If it has more than one, then it is stereo.
Jerry Garcia famously used a guitar with stereo outputs, a reproduction of which is pictured below.
Notice the two different output jacks on this guitar. This allows you to run your guitar directly into two different amplifiers, or even into two separate effects chains and then into two different amplifiers, giving you a truly stereo signal chain from start to finish.
Stereo amplifiers, on the other hand, are a little different. The most well known example of a stereo amplifier is the Roland Jazz Chorus.
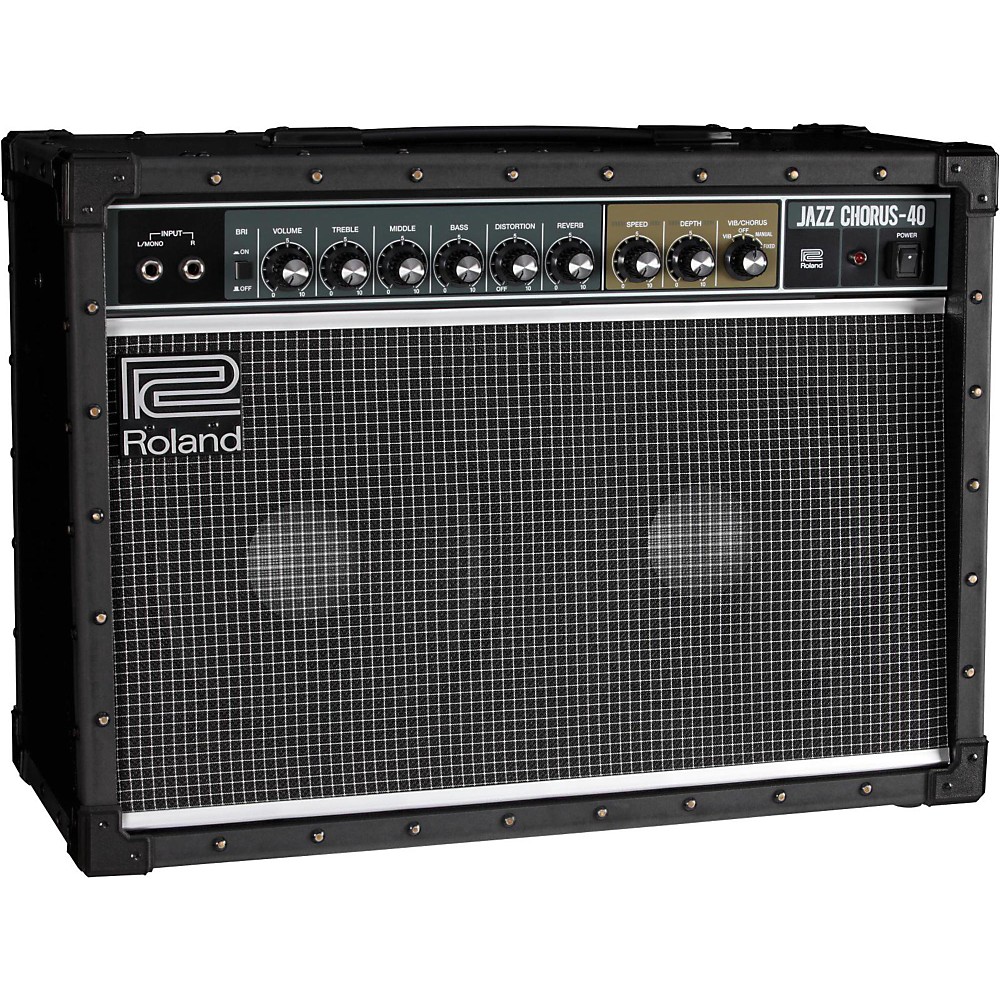
The Roland Jazz Chorus, pictured above, is a well known amp for a variety of reasons. First of all, it is one of the most highly regarded solid state amps in terms of its overall tone, but it is also well known for its stereo chorus. The chorus effect that this amp was built with is called a stereo chorus because the amplifier sends out a slightly different chorus signal to each of the two speakers inside the combo amp to produce a truly stereo chorus effect. If you were running a traditional mono guitar into a series of mono effects and into this Roland Jazz Chorus, you would still have a mono signal, but the chorus effect coming from the amplifier at the end of your signal chain would be in stereo.
It is interesting to note that the famous Boss CE line of chorus pedals used the same circuit as the Roland Jazz Chorus for its chorus effect, but unless you run this effect in stereo it will not be a stereo chorus effect like it is in the Roland Jazz Chorus amplifier.
Regardless of stereo guitars and stereo amplifiers, what people are generally referring to when they talk about running their guitars in stereo is taking a typical mono guitar and running it into a pedalboard that may start out mono but eventually splits into a stereo signal, and then out from that pedalboard into two different amplifiers. These two amplifiers could themselves be stereo amplifiers like the Roland Jazz Chorus or not, but as long as they are receiving a stereo signal from stereo effects pedals, the setup will be stereo just the same.
Let's imagine for a moment you are using your mono output electric guitar and running it into a mono overdrive pedal like the Ibanez TS808.
From this pedal (which is mono because of it's single input and single output) you are splitting your signal by using a Morley ABY switch.
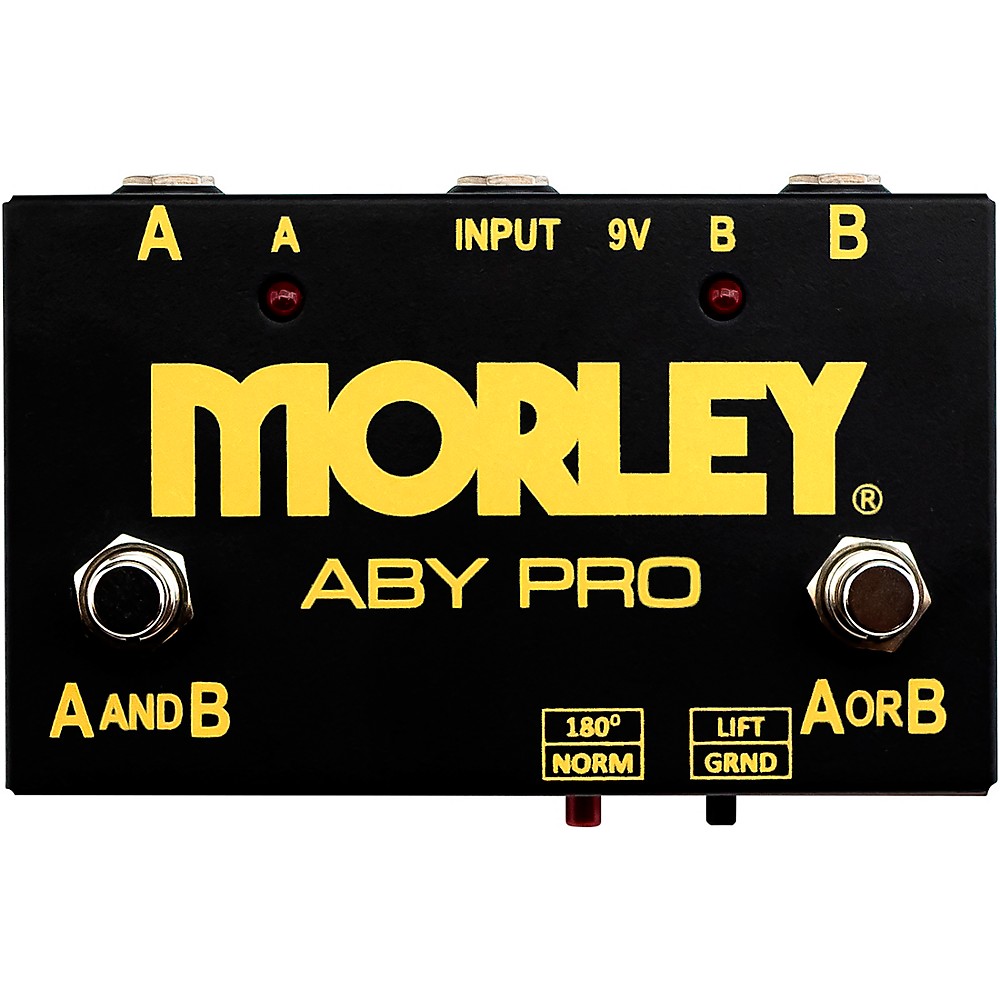
This switch splits your signal and sends it to two different amplifiers. Although you are sending the signal to two different amplifiers, due to the fact that you are sending the exact same signal to both amps, technically speaking this is an example of a "dual mono" signal chain rather than a truly stereo one.
In order to make this signal chain truly stereo, you would need to put an effect with stereo outputs before the two different amplifiers. If we replaced the Morley ABY switch with a Strymon Timeline, for example, this would do the trick.
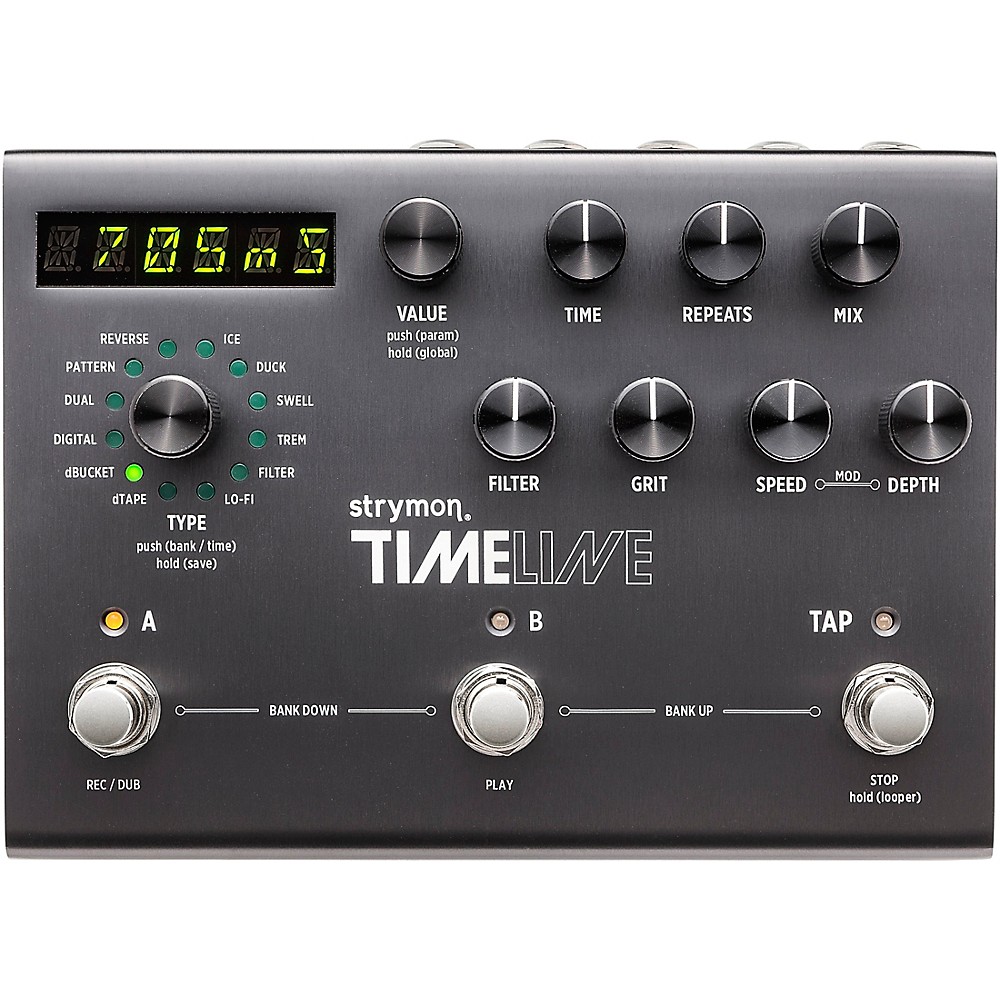
The Strymon Timeline is a stereo effect and it will send a slightly different signal to the two different amplifiers. A common example of this is a ping pong delay effect, which is a slightly different delay trail sent to each amplifier and it gives your guitar signal a uniquely wide and really great sound. Since this pedal is stereo and it has two separate outputs on it, you do not need a splitter like the Morley ABY switch in order to send your signal to two different amplifiers.
Some people like to use a "wet and dry" approach to their stereo effects. This can mean different things for different people, but a great example of this is given in Premier Guitar's Rig Rundown video with guitarist Alex Rosamilia from the Gaslight Anthem.
At about 15 minutes into this video, Rosamilia describes how all of the time based/modulation effects on his board are sent to one amp while the other amp is completely "dry", affected only by the drive effects on his board. This is a pretty popular way of running a stereo effect chain and it can be really cool!
Often abbreviated online to 4CM, the four cable method is when a guitarist, either with a digital multi effect system like the Kemper or the Line 6 Helix, or by using the effects loop in their amplifier places some of the effects in their signal chain after the amplifier.
If you consider our previously mentioned signal chain consisting of a guitar going into an Ibanez TS808 and then into a Strymon Timeline and then into two different amplifiers, we can use the effects loop (as long as each amplifier has an effects loop) to put the Strymon Timeline after the amplifiers in our signal chain. We can do this by going from the guitar into the TS808, and from the output of the TS808 into the input of the Morley ABY. From each output of the Morley ABY we would then go into the input of each amplifier. Then we would connect a cable from the "send" jack at the back of each amplifier where the effects loop is into both of the inputs on the Timeline. From there we need to connect a cable from each of the outputs of the Timeline into the "return" jack in the effects loop of both amplifiers. Now our Timeline is running in stereo in the effects loop of both amplifiers!
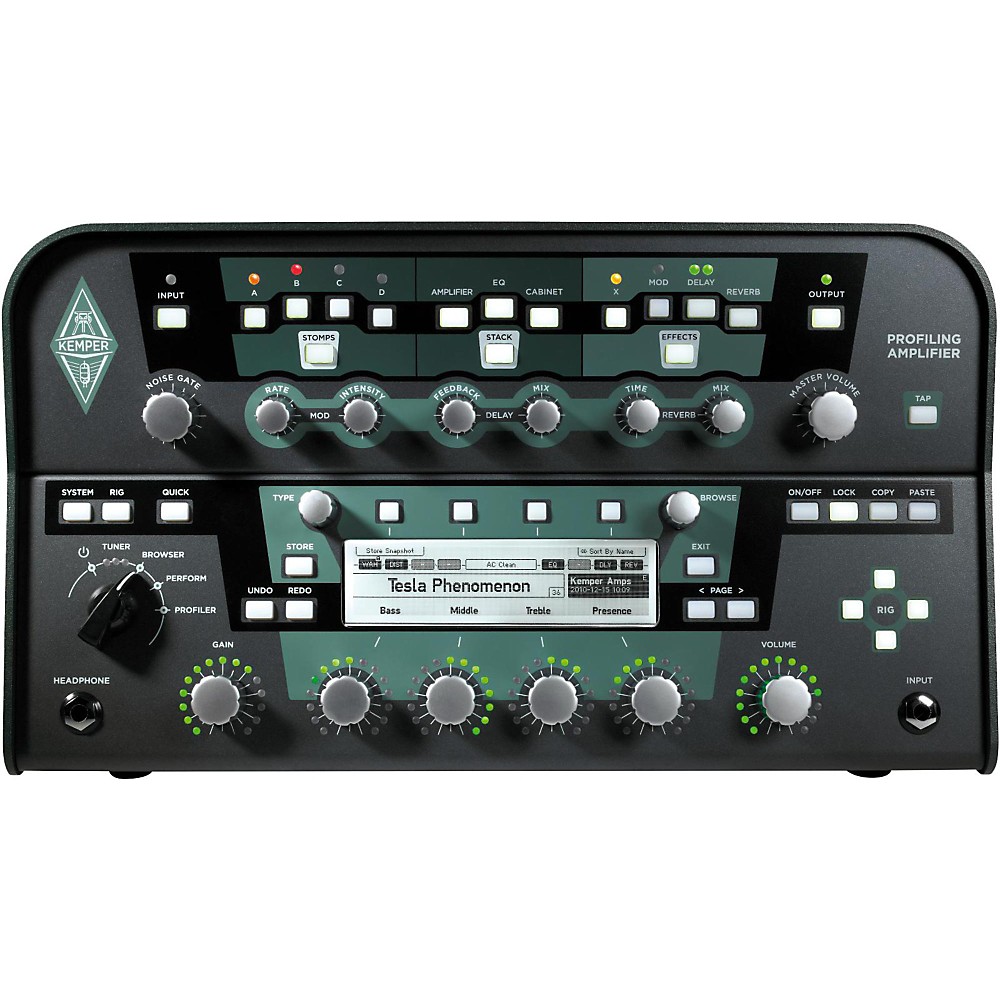
When I am working for artists as a freelance guitarist, I often use a Kemper. Kempers along with other comparable digital effects units like the Fractal Axe fx, the Line 6 Helix and even the Neural Quad Cortex are able to be used in stereo even without any stage volume. All you need to do is be sure that you are selecting stereo effects in the software and make sure that front of house sound is taking two stereo outputs from your digital unit in order for the delays and reverbs to be stereo in your monitors and at front of house.
In an effort to reduce the amount of processing done by my Kemper during a gig and to mitigate the risk of something going wrong, I also run a Line 6 HX Stomp in my signal chain. It took me a while to get it running the way that I want, and honestly I've never seen any videos or anything on how to do it the way that I do (although I'm sure I'm not the only person doing it this way) so let me explain my signal chain here.
The first thing that my guitar goes into is the Digitech Drop pedal.
This pedal flat tunes your guitar for you and it saves me having to fly or tour with multiple guitars. I can't say enough about this pedal and I recommend it to anybody who works as a freelancer. The Kemper and the HX Stomp can both do what this pedal does, but having it first in the signal chain makes it sound better, and it also frees up processing power on the Stomp and the Kemper. From the Drop pedal my signal goes into the HX Stomp.
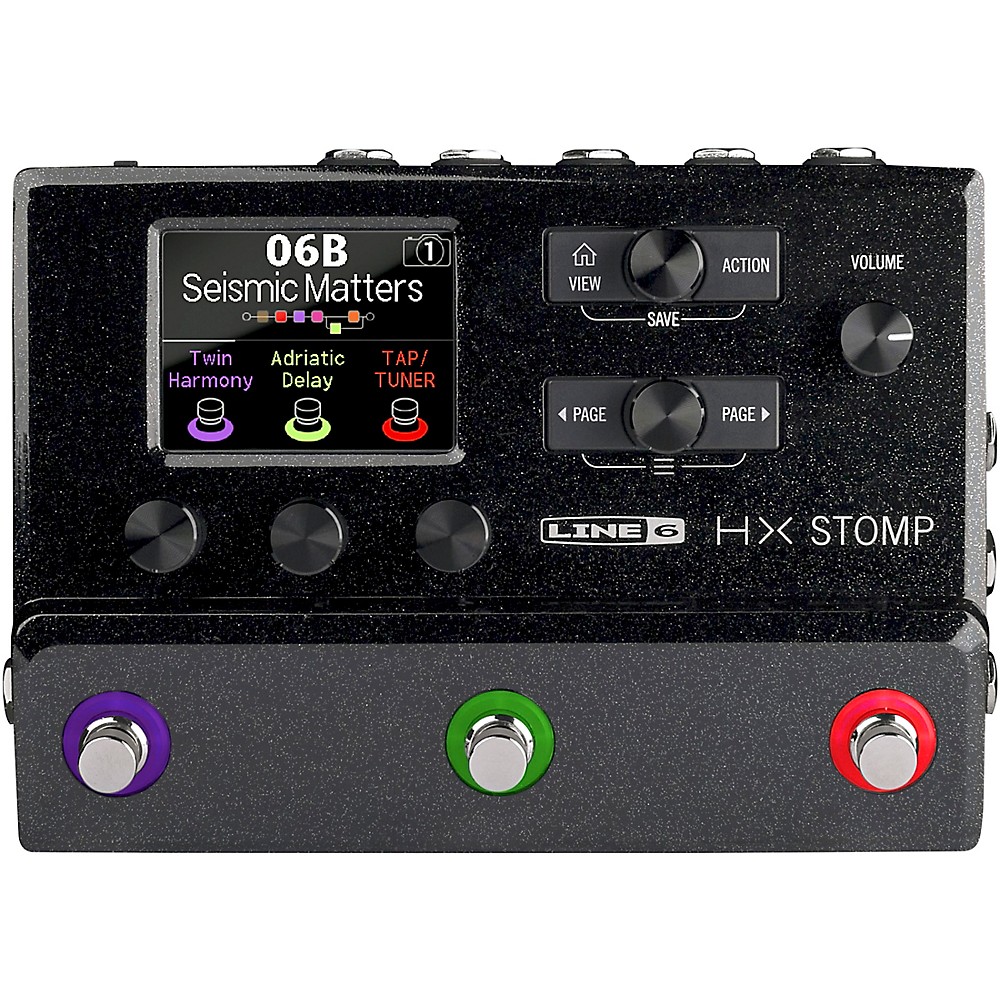
Inside the HX Stomp you can create a signal chain so no matter what else I am putting in my signal chain I always include an effects loop. From the "send" jack of the effects loop my next pedal is the Dunlop Mini Cry Baby.
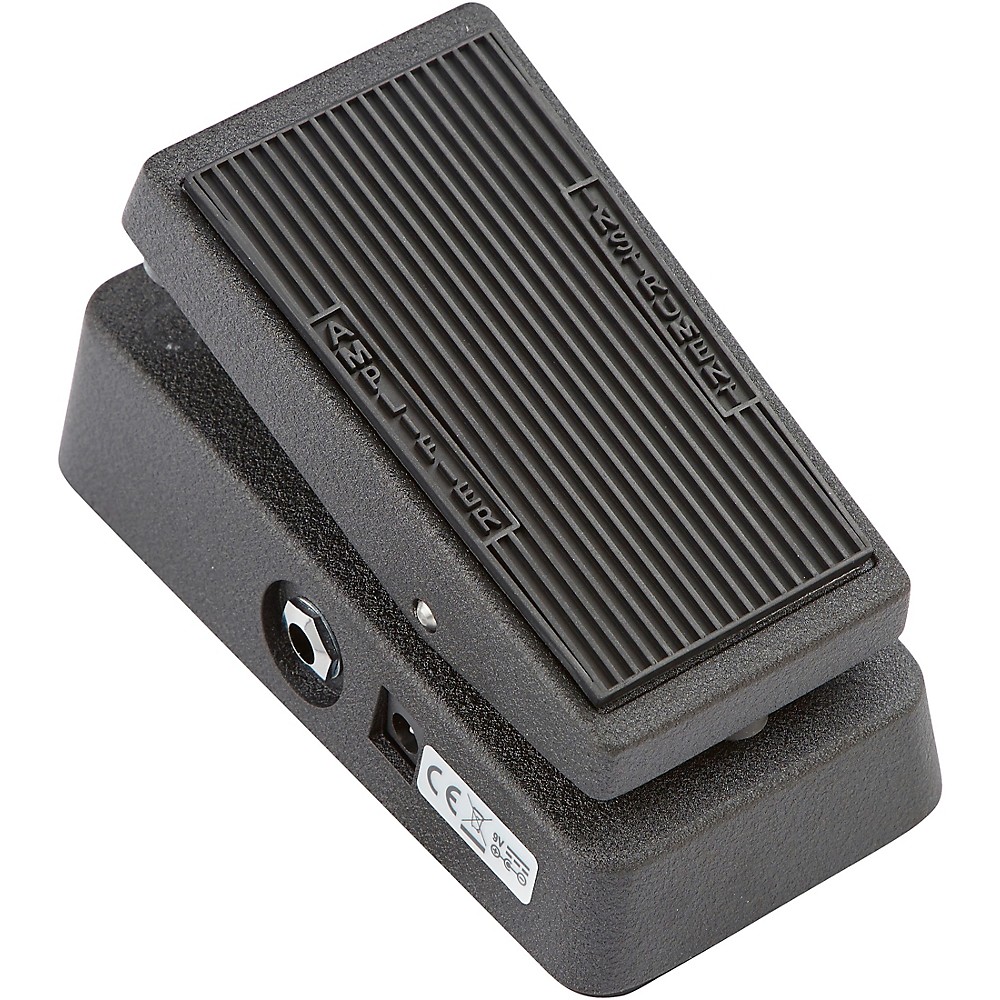
I am very picky about wah pedals and not only is this one a great size, it's also the best sounding wah that I own (and I own many). Also I've never heard a wah that the Kemper or HX Stomp made using an expression pedal that I have ever been happy with. After the Mini Cry Baby my signal goes into the input of the Kemper.
In the Kemper software, just like in the HX Stomp software, I make sure that I create a stereo effects loop. Then from the "direct output/send" jack on the back of the Kemper I connect a cable to the "return" jack of the HX Stomp. Then, from the stereo outputs of the HX Stomp I go into both the "return input" and the "alternative input" jacks in the back of the Kemper.
By wiring the Kemper and the HX Stomp together this way, I'm able to create mono effects like overdrive or compressors or EQ that go ahead of the amp profile in the Kemper from either the Kemper or the HX Stomp. Also, I'm able to create stereo modulation or time based effects like reverb or chorus or delay from either the Kemper or the HX Stomp that are placed after the amp profile.
I hope this article was able to give you some answers about what it means to have a stereo guitar setup, and I hope you're able to take this information and maybe try something new! I'm always happy to answer comments or concerns, and thank you so much for checking out my thoughts on this subject.
]]>These days there is no shortage of armchair experts who use the word "compression" in ways that can be confusing if you're unfamiliar with the term. I've often heard people describe modern music in general as over compressed, or I've heard people describe an overdrive pedal or an amplifier as having a nice tube compression. I've even had people advise me that some issue I'm having with my guitar sound can be solved by compression. But what exactly is compression and can a compressor pedal really help that much, or can some of this just be chalked up to placebo effect?
In my younger days all of this vague conversation around compression caused me to experiment quite a bit with compressor pedals and I'd like to help anyone who is a little confused about what compression actually is to understand what these pedals can do for your guitar.
In simple terms, compression takes the volume dynamics of anything being compressed (in audio production, you can compress vocals or drums or guitar or even an entire track) and evens them out. This means that things that are quiet become louder, and things that are comparatively quite loud will get quieted down a little bit.
There are some relatively ubiquitous terms used to describe some common parameters of compressors, however not all of these parameters are available as controls on a guitar pedal. Some guitar pedals might have only two control knobs that might have different names than the ones described here, but usually even in these cases the terms are synonymous with one of the following parameters.
Threshold: This describes the level at which the compressor will engage. Any signal that is quieter than the threshold level will not be compressed, and anything above the threshold will be compressed.
Ratio: This describes the degree to which your signal will be compressed. The higher the ratio, the more the guitar's signal will be squashed once it passes the threshold. While on a guitar pedal this sometimes appears as a knob and so an actual numeric ratio isn't visible, it can be thought of in the following way. A ratio of 2:1 means that for every 2dB of volume above the threshold, the compressor will allow 1dB of volume increase. A ratio of 200:1 means that for every 200dB of volume above the threshold, the compressor will allow for an increase of 1dB in volume.
Attack: This describes how quickly the compressor will act. A shorter attack time means the compressor reacts quickly, a longer attack time means the compressor reacts a bit later.
Release: This describes how long the compressor is acting on the sound. A quicker release means that as the note rings out, the compressor will back off. A longer attack time means that the note will remain compressed as it rings out.
Notably, some guitar pedals have a sustain knob. While it is best to consult the owner's manual for the specific pedal in order to have the most accurate understanding of what this knob will do on a particular pedal, it is often describing the threshold or ratio or some predetermined combination of the two.
Additionally, many guitar pedals have a volume or level knob. Again, while it is best to refer to the owner's manual, this is often an output gain control.
Finally, many guitar pedals have a blend knob. As always, reading the owner's manual for a specific pedal will provide the best answer, but this is usually a knob used to bring in some of the unaffected, uncompressed sound into your signal.
Compressor pedals have been an undeniable part of the tone of some pretty iconic guitarists. Trey Anastasio from the band Phish has used a compressor pedal for a very long time, and you can find a compressor pedal near the front of the signal chain for just about every country guitarist worth their salt.
With that said, it might be surprising to learn that the overwhelming majority of compressor pedal circuits are based off of just one model: The Ross Compressor.
With just two knobs, this compressor is the most copied circuit on the market today. Some clones like the Keeley Compressor or the Wampler Ego Compressor have additional controls that give you greater control over the way the pedal affects your sound, but the circuit for the compressor is the same.
The Ross Compressor was reissued around 2019 (this may not be the exact year), however they are hard to find and a little pricey. Original Ross Compressors are in my humble opinion, too expensive to justify the purchase.
The Ross Compressor may be the most copied circuit out there today, but it wasn't the first. The Ross Compressor was actually an improved version of the MXR Dynacomp, a model still in production today and at a pretty reasonable price point.
Robert Keeley of Keeley Electronics, who is well known for selling very popular modifications of some classic effects pedals by Boss and Ibanez, has also made some very cool tweaks to the Ross Compressor circuit with his line of compressor pedals.
This four knob compressor includes an attack control (the attack on the Ross and Dynacomp Compressors were preset) and a knob labelled "clipping". This clipping knob is really an input gain and allows the user to adjust the input gain so that guitars with high output pickups will compress the same way that guitars with low output pickups will without clipping the input.
The Wampler Ego Compressor is a favourite in the country world, and it includes one of my favourite additions to the Ross Compressor circuit, the blend knob. This is not the only Ross clone to include a blend knob, in fact the Keeley Compressor Plus also has one, but this is the first one that I remember seeing and was definitely the first one that I owned.
Pros: There are lots of reasons you might want to use a compressor, and there's no way I can cover all of them, but I can briefly describe from my own experience what I like about them.
First, there is a tone that a compressor adds that is absolutely essential to certain styles of guitar playing. That feeling of a squashed note or chord fits so well in a country band or even in a funk band and it can really help to fit in in some of those settings.
Second, a compressor can be very helpful in settings where you want all the notes in your chords to sound even. While balanced chord playing is definitely something any guitarist can afford to work on, a compressor can help attain a certain type of evenness in your chords that can sound great.
Cons: While there are certainly benefits, there is always a down side.
First, the fact that many of the compressors out there on the market are clones of the same circuit means that many compressor pedals share the same issues. For me the most glaring is that they can add an unwanted amount of noise into your signal chain. Sometimes this can be controlled with a noise gate, or sometimes it isn't too egregious, but it is something to consider.
Second, in a live setting I sometimes find myself struggling with compressors. By virtue of the fact that compressors even out some of your dynamics, I sometimes find myself struggling for dynamic range in my playing when I'm using a compressor. This might not be a relatable experience for other guitarists, but it has been my experience. I should note however that this issue is often abated by the use of in ear monitors on a gig.
I'd like to end this post off by mentioning my favourite compressor pedal that I've ever owned.
The EP Booster by Xotic Effects is designed to emulate the sound of the preamp section of the Echoplex, which was an old tape echo machine that had a notably unique pre amp sound.
While this isn't intended to be a compressor pedal and it is only meant to be a clean boost, I have found that this pedal produces a really compressed tone in a very musical way. For anyone who is really fighting to find a good compressed tone I suggest checking this pedal out.
Thank you so much for checking out my thoughts on compressor pedals, and please feel free to reach out with any comments or concerns! As always, its a huge privilege for me to be a super small part of your journey with the guitar.
Take a look at Guitar Center's Daily Pick by clicking the link right here:
Unreliable cables are liable to fail without any warning and it doesn't feel cool when it happens. Perhaps if you just play at home this is less of a concern, but there is nothing worse than having a cable fail on you in the middle of a gig. I first learned this with 6" cables used for connecting pedals together. If you've got a pedal board, standing over it in the middle of a rehearsal or a set break trying to trouble shoot which of the cables you used to string it together has failed is a quick way to look like a goof. This one particular point may not have much to do with tone, but a patch cable must first be functional and reliability is pretty much the name of the game in that respect.
These style of cables are called "pancake" cables for their flattened appearance at the tip, and they are my all time favourite kind of cable to run in between pedals. I have found that pancake cables have been the most reliable, with the added benefit of a reduced amount of space required to accommodate them on your board. This brand called Audioblast sells their pancake cables at a very affordable price, but they are super reliable despite the price point.
While these are not pancake cables, Fender's Professional Series 6" cables are another super reliable choice for running between pedals. These cables are built from high quality components and in my experience they hold up when you need to twist one into an "S" shape to connect between pedals.
This is why it is important to only use as long of a cable as you need to for the gig. If you use a pedal board and you play in small clubs or venues, it is often the case that a ten foot cable from your amp to your pedals and another ten foot cable from your pedals to your guitar is more than enough. If you don't use a pedal board, you may find that you need one twenty foot cable from your guitar to your amplifier. Check out this video where Pete Thorn and Thomas Nordegg talk about the impact of cable length on your tone and demonstrate the difference between six feet of cable and fifty feet.
For this reason, it is important to have a couple of different lengths in your guitar case if you're headed to a gig.
These D'Addario American Stage Instrument Cables are available in either 10', 15' or 20'. While they may not be the cheapest cable on the market, they are in my experience the highest quality cable without spending more money than you need to, and they are the best cable to run from your amplifier as well as from your guitar.
When it comes to cable length, a widely known product that many guitarists love is George L's Cable Kits. These kits come with connectors, jackets for the connectors, and cable length that you can cut yourself. These kits allow you to custom make cables using nothing more than a wire cutter and zero soldering that are exactly the length that you need for your pedal board or to connect your guitar or amplifier.
I have met some guitarists who are a little concerned about the fact that George L Cables are solderless, however I have used dozens of these cables that I have cut myself with very little know how and I have never had an issue with one. Conversely I have had plenty of issues with poorly constructed cables that do have soldered connections.
Both Mogami Gold Cables and Monster Cables come with a lifetime warranty. I would make sure before buying these that this warranty applies to where you live, but for me this is a major selling point.
Perhaps this is a feature that you find appealing and far be it for me to rain on your parade, but I have often found that these types of features can have a negative impact on the reliability of the cable. If you have had positive experiences with these cables, please let me know by commenting or reaching out, because I am of course only able to relay to you my own subjective experience. However, if you're looking for advice on what cables to buy I would like to suggest that simplicity is an asset.
Thank you as always for checking out my thoughts on this subject, and please don't hesitate to reach out to me with any thoughts or concerns. I really appreciate the opportunity to be a super small part of your journey with the guitar, and its something that I do not take for granted.
The Spark Mini doesn't include the three way eq toggle that the larger version does, but it has its own unique feature. The Spark Mini has a bypass switch that will act like a traditional on/off switch if used normally, but if you hold your foot down it will convert into a momentary switch. This is super cool for boosting lead lines and making short parts pop.
If you're a true penny pincher you may be wondering why I included this pedal as its price tag, unlike the rest of the pedals in this blog post is over $100. However, ten minutes with this pedal and you will understand why I consider it to be so affordable. The Line 6 M5 kind of acts like a wild card on my pedal board. Before I bought the M5 I remember artists would ask me in rehearsals "hey could you throw some tremolo on that verse part" and I'd say "ok but it will have to wait until tomorrow because I didn't bring my tremolo pedal". Then the next day they'd say "hey I thought I wanted tremolo but really I'm thinking maybe a phaser would sound better". Well with the M5 at the end of your pedal board, you can dial in whatever effect is needed and you don't have to sacrifice too much real estate to do it. Not only does the M5 have a bunch of great chorus, tremolo, phaser, flanger, and reverb sounds but it also has a whole bunch of really great delays as well, all for less than the cost of most other delay pedals on the market.
This pedal is great for anybody who needs to get a bunch of different sounds out of their pedal board, or for anybody who is learning about different effect types and wants to be able to have lots of things at their fingertips.
With a slightly smaller display but an attractively tiny footprint, the mini version of the Polytune has all the same features as the larger version. I've used the Polytune mini for years and I count on it to keep me sounding good all the time.
Thanks so much for checking out my list of my favourite affordable guitar pedals! Feel free to comment or reach out with any questions or concerns, and as always thank you for making me a super small part of your journey with the guitar. It's something that I never take for granted!
This is the first group of pedals that you should put at the very beginning of your signal chain. The effects in this group can be organized differently from what I have laid out here, but it's a good idea to keep the pedals in this group ahead of any of the pedals in groups 2, 3 or 4.
*Digitech Drop Pedal
This is a very specific recommendation, but for anybody who uses this pedal I highly suggest putting it at the very beginning of your signal chain. This pedal will detune your guitar for you to flat tunings. I use it all the time, and it works incredibly well. In order to allow this pedal to function at its best, I always put it at the start of my signal chain.
Tuner
It is very important that a tuner pedal gets as direct a signal as possible from your guitar to give the most accurate as possible reading of your pitch. For this reason, almost every guitarist puts their tuner pedal at the beginning of their signal chain. The only time I will ever run any pedal ahead of my tuner is when I need to use my Digitech Drop pedal, other wise I will always put my tuner first.
Wah
By placing the wah pedal as close to the beginning of your signal chain as possible, you will give your wah the widest possible range that it can give. Putting the wah pedal after pedals that affect the tone such as overdrives or even compressors can cause the effect of the wah pedal to be greatly reduced.
Compressor
Compressor pedals should be placed after your tuner and after your wah pedal, however its a bad idea to put compressors after drive effects. This is because compressors tend to add a high level of unwanted noise if they are put after overdrive effects.
Overdrive/Distortion
I tend to require less dynamic range from pedals that colour the tone more. This is subjective, but for that reason I put more overdriven pedals near the end of this group.
Fuzz Boxes
Fuzz effects can be very noisy if they are placed in the wrong spot in your signal chain. The best place for them is at the end of all of your overdrive sounds.
Phaser/Chorus/Flanger
I could go on forever listing different modulation effects, but these are three very popular kinds. As long as you keep your modulation effects in this group, you can order them how you like, depending on what works best for you and your playing.
]]>
Canada's international reputation is predicated on a few, fairly odd stereotypes. Sure, we do have lots of moose and beavers hanging around outside, and I have been told by my largely American family that the way I say "about" is objectively incorrect. However, one of my favourite things about Canada is something that never makes its way into the stereotypes, and that is that Canada is home to some truly innovative and high quality guitar manufacturing. Maybe you've heard of some of the larger Canadian guitar manufacturers like Godin or Larivee or even Boucher (if you haven't then you should definitely check them out), but I wanted to take an opportunity to shine a light on some smaller, independent manufacturers.
This article will discuss my four favourite Canadian guitar manufacturers: Sorokin Guitars, Frank Brothers Guitar Company, Cithara Guitars, and Millimetric Instruments. Each of these companies is doing something innovative in their approach, and contributing greatly to the art of the guitar and I really think that those of you who are not Canadian deserve to know about the incredible instruments being made by these builders.
Built in Edmonton Alberta and owned by Alex Sorokin, Sorokin Guitars pay visible homage to early 1950's era Gibson Les Paul and Les Paul Junior models. On his website there is a photo blog of guitars that Mr. Sorokin has either built himself or has done some work on, and below is a picture of a double cut single pickup guitar that he built that was recently posted on his instagram page.
One of my favourite things about Sorokin Guitars is their headstock design. There are many guitar manufacturers that build high quality guitars inspired by 1950's era Gibson models like Collings Guitars or Heritage Guitars, but Sorokin has by far the best headstock design. It's almost a metaphor for what appears to be their entire approach to building guitars. The headstock design doesn't hide from the influence Gibson guitars have had on the design of their instruments, instead this headstock embraces it, and in doing so it creates something totally original and equally as beautiful.
According to the Sorokin Guitars website, guitar building is simply a hobby for Alex Sorokin. Because of this, Sorokin Guitars will not make custom orders. This just makes me want one more. Guitars are available to purchase and are made available for sale through a guitar store in Edmonton Alberta called Stang Guitars.
Here is renowned guitarist and song writer Joey Landreth talking about his Sorokin guitar modelled loosely after a 1954 Les Paul:
I for one will be watching Sorokin Guitars closely for the next little while, as they have been posting about an upcoming single cut all original guitar model and I can't wait to see the finished product. To keep up with Sorokin Guitars, check out their website, Facebook page and Instagram account.
Frank Brothers Guitar Company is situated in my home town of Toronto, Ontario. Located in the east end of the city, Frank Brothers Guitar Company is owned and operated by three brothers (Nick Jon and Tim) and has been around since 2014.
Frank Brothers build made to order guitars with customizable specifications. Check out their website to see all of the ways that you can customize your guitar or follow them on Instagram or Facebook to see the endless creative modifications being made to their three available models.
All of the three models that Frank Brothers Guitar Company builds have their unique body design. I have always been in love with this design because I think that it strikes a perfect balance between tradition and innovation.
This photo, taken from their website is of their Signature Model. There is really something incredible about these guitars. The body shape, the "bowtie" headstock design, the floating tailpiece, all contribute to this completely original and yet instantly classic design.
Frank Brothers Guitars are becoming less and less of a secret. James Bay has played one for years, and here is a video of Cory Wong talking about his Frank Brothers guitar.
Frank Brothers Guitar Company handles all the sales of their guitars directly. To order one for yourself, check out their website. They ship internationally and your instrument will arrive at your doorstep!
Located in Hamilton, Ontario, Cithara Guitars is owned and operated by Daniel Clark. Cithara Guitars does restoration and repair work, and also offers a complete line of their own guitar models. Check out their website to learn more about the different models that they build. Pictured below is their Jason Barry signature model.
Cithara Guitars offers some really unique products and experiences that are unlike any other guitar manufacturer.
First, Cithara Guitars sells DIY guitar kits that allow you the opportunity to assemble your own electric guitar. All of the DIY kits are inspired by popular guitar designs by Gibson or Fender, but they often offer unique tweaks on those designs. For example, their Les Paul inspired DIY kit features an ebony fretboard, and their Stratocaster inspired kit features a basswood body. Check out their website to learn more about their DIY guitar kits.
Second, Cithara Guitars offers a full six month course in guitar building. Check out the details here.
Daniel Clark and Cithara Guitars are unique because they actively participate in the Canadian music scene, particularly the country music scene. Here is Daniel Clark talking about Cithara Guitars and their involvement with the Lucknow Music In The Fields Festival
To follow along with Cithara Guitars or to check out their instruments or products, check out their website or Facebook or Instagram accounts.
Finally, I've saved the most modern for last. Millimetric Instruments based out of Montreal, Quebec is a company that is building some very unorthodox yet captivating guitars.
They build guitars made to order with customizable features such as colour, pickups, neck profile and wood. They have five different models to choose from that each have a very modern and beautiful look.
This is a photo of their first ever design, the MG6 taken from their website. The unique placement of the input jack and electronics is intended to make this guitar equally suited for left or right handed guitarists.
My favourite aspect of their design is the unconventional bolt on neck. Here is a photo of the back of this same guitar pictured above:
One of the reasons for this intriguing bolt on neck design is that it provides an improved sustain. Another very interesting aspect of the design of these guitars is the headstock. Not only does the open hole in the headstock allude to guitars built by luthier Travis Bean, they also offer very easy access to the truss rod.
These guitars stand out from the crowd and are an absolute statement. Here is a video that talks about their MGS3 model and some of its features.
You can follow Millimetric Instruments by checking out their website or by following them on Facebook or Instagram, and if you're interested in ordering a guitar from Millimetric Instruments, you can contact them on their website.
Thanks for checking out my article! Feel free to reach out with any questions or concerns. As always, thanks for making me a super small part of your journey with the guitar, its something I never take for granted :)
Also, take a look at Guitar Center's Daily Pick for some awesome gear by clicking right here:
The best way to explain a floating bridge is by contrasting it to a traditional guitar bridge. Most traditional guitar bridges, like the ones on acoustic guitars for example, are "fixed" in position.
Fixed Bridge
The position of this bridge is not moveable or adjustable. The bridge on an acoustic guitar like the one shown above, is often held in place by glue. The glue doesn't allow the bridge to move at all, and if it were not held in place by glue the tension from the strings would pull the bridge up off of the body of the guitar. Telecasters, Les Pauls, and many common models of acoustic and electric guitars have fixed (sometimes also referred to as "hard tail") bridges.
Floating Bridge
On a floating bridge, there are two adjustable tensions acting on the position of the bridge. The first is exerted by the strings, which are pulling the bridge upwards, and the second is exerted by the springs in the back of the guitar, which pull the bridge downwards, towards the body.
Every guitar with a floating bridge has a cavity in the back containing springs. These springs work to pull the bridge downwards, towards the body of the guitar. Unlike the earlier example of a glued down fixed bridge found on many acoustic guitars, how much tension the springs exert on the bridge is adjustable. When the springs are set to exert a relatively low amount of tension on the bridge, the bridge will no longer sit flush to the body of the guitar. This is what is known as a "floating bridge".
To increase the tension from the springs and bring the bridge closer to the body of the guitar (reducing the amount of upward range available with the whammy bar) tighten the claw adjustment screws. To reduce the tension from the springs and allow the bridge to float more (increasing the amount of upward range available with the whammy bar) loosen the claw adjustment screws. Try to tighten or loosen each side evenly.
Another way of affecting the level of tension that the springs exert, and also the amount of resistance you feel when using the whammy bar is to increase or decrease the amount of springs connected to the claw.
Most Stratocaster style bridges will accommodate up to five springs, but there are guitarists who use pretty much every possible permutation. Adding or removing springs is an easy and inexpensive way to modify your guitar on your own.
More modern Stratocaster style instruments have accounted for the tendency for guitarists to use floating bridges in their construction by modifying the bridge plate. Vintage Stratocaster models used six screws near the saddles of the guitar, but modern Strats as well as Stratocaster style instruments made by companies like G&L use two pins to fix the bridge plate to the body of the guitar near the saddles.
The above bridge plate has the 6 screw vintage style configuration.
And this one has the two pin configuration.
As with anything in the guitar world, there is a great deal of discussion online about which bridge style sounds better. Personally, I can't say which sounds better. My Strat has the modern style two pin bridge configuration and I personally love it. I think the two pin configuration is functionally better if you intend to set up your bridge so that it's floating, but I really can't speak to the tonal differences between the two, and I am skeptical of anyone who claims that they can.
If you have any questions or concerns regarding this article or anything else guitar related, please feel free to reach out to me! Thank you for allowing me to be a super small part of your journey with the guitar, it's a privilege that I don't take for granted :)
Take a look at Guitar Center's Daily Pick by clicking the link right here:
There are a couple of ways that YouTube can be used as a tool to help guitarists learn to play in time. The first of which is a relatively new feature offered in YouTube's playback settings.
Slowing Things Down
YouTube now allows viewers to alter the playback speed of a video. Guitarists who are my age will remember using third party software programs in the past like "The Amazing Slow Downer" (which by the way still exists) to slow down CD's or audio files without affecting the pitch. YouTube now allows users to do this for free on the settings of the YouTube video. Step 1, click the "settings" icon at the bottom right of the video. Step 2, click "playback speed". Step 3, select between the playback speed options, or optionally Step 4 shows how you can select a "custom" playback speed.
The ability to slow down a challenging passage or song is a helpful learning tool because it allows you to hear the actual rhythm of the part you're attempting to learn. In order to slow things down by using a conventional metronome, it is important that you understand the rhythm of the part to be able to do it correctly. For example, if a particular phrase starts on beat 4 of the bar but you are not aware of this or you are not taking that into consideration, you likely will not be able to hear the phrase in your head by simply turning on a metronome and this can cause frustration. Slowing the actual music down eliminates this problem because the actual part remains there for reference, and all you need to do is play along with it.
One aspect to slowing things down on YouTube that is less than ideal is that as you slow a video down, the audio will begin to sound grainy and bad. The more dramatically you slow the video down, the more apparent this degradation becomes. Slowing things down too much can even make the part almost impossible to discern at times, depending on the particular song and video. Still, this is a fantastic learning tool that I take advantage of often.
Backing Tracks
If you are working on something that is not a song or a specific part but is more like a concept, backing tracks are an incredible help for this. Concepts such as the modes of the major scale, minor or major pentatonic scales, or even more advanced things like triad coupling or polyrhythms can all be woodshedded by using backing tracks. YouTube has a surprisingly vast library of backing tracks that includes everything from single chord vamps to 2 - 5 - 1 cadences, giant step changes, rhythm changes, blues progressions all the way up to full 32 bar jazz standards and just about everything in between.
Backing tracks are an engaging way to work out a new scale or arpeggio or concept across your fretboard in time, while simulating an experience that feels a bit more like "making music" than perhaps a conventional metronome.
I found these videos to be particularly helpful when trying to understand how to make drum loops in Garage Band, and if you're looking to try it yourself, this might be a good place to start.
Teenage Engineering has some really interesting and easy to use drum machines that are portable and low cost. The model on the left has not only drum samples, but also some samples of some melodic instruments. This means it is capable of providing somewhat of a harmonic context as well. The model on the right is just a drum machine, without the melodic samples included. Both of these are really engaging practice tools and can help you to play in time.
This metronome by Soundbrenner is worn like a watch and rather than giving you the tempo with clicks, the watch vibrates allowing you to feel the pulse. This metronome boasts some pretty impressive features including the ability to sync up with other ones, communicate with DAWs and even save setlists. For guitarists who are interested in technology, practicing with such an advanced metronome can be an engaging experience, and can make practicing with a physical metronome lots of fun.
Thank you for checking out my thoughts on practicing in time. I hope you got something out of it, and as always please feel free to reach out with any questions or concerns. Thank you for allowing me to be a super small part of your journey with the guitar, its something that I don't take for granted :)
Guitars can be adversely affected by conditions that are both too dry and too humid. It is important to make sure your instruments are being kept in a stable environment where the relative humidity is within the range (ideally) of 45% to 55% humidity. That said, keeping your instruments within a reasonable proximity to that range will likely not damage them.
Symptoms that your guitar is being negatively affected by dry conditions (very low humidity levels) may include:
Sharp fret ends. This occurs when the wood of the fretboard contracts under dry conditions.
Front bow in the neck. This can cause buzzing on the upper frets that can't be fixed by raising the action unless it is raised extremely high.
Fretboard "bump" at the 12th or 14th fret. Where the neck connects to the body dryness can create an upwards "hump" on the fretboard.
On acoustic guitars, a sunken top or flat back. Low humidity can cause the top of acoustic guitars to sink inwards, and can cause the back of the body to flatten out.
In extreme cases of dryness, wood can crack, glue joints can split or need repair, and finish can crack.
While exposure to high levels of humidity can in extreme cases be just as detrimental to your guitar as dryness, it is not as common of an issue as exposure to dryness. If you are worried that your guitar is exposed to too much humidity, some symptoms to look out for include:
Swelling of the body. Opposite to the effect of dryness, too much humidity can cause the body of your guitar to swell out.
Unplayably high action. As the body of the guitar swells, the bridge rises up causing the action to become unplayably high.
The D'Addario 2 way humidifier is a pack you can leave inside your guitar case that will not only humidify your guitar case, but if the humidity levels inside your case become too high, this product will absorb humidity and maintain the level between 40% to 50%.
If you are not in the habit of keeping your guitars in their cases, I highly recommend you keep a humidifier in the room where your guitars are kept. I have this exact humidifier kept in my home office right next to my guitars, and it has been a game changer during the winter.
If your environment is too humid...
To lower the humidity levels of your environment, try using
Silica gel packs placed inside your guitar case. These are designed to absorb moisture and protect products from damage due to humidity. Keeping one of these inside your guitar case will reduce humidity levels.
I know I already mentioned this one, but the D'Addario 2 way humidifier is meant to lower humidity levels that are above 50%. If you are looking to reduce humidity levels, this should do the trick.
If you are not in the habit of keeping your guitars in the case, air conditioning units will decrease humidity and running an air conditioner will help to keep humidity levels from becoming too high. Unfortunately, I don't have enough personal experience with air conditioning units to recommend something that would be effective for this use.
Thank you as always for checking out my thoughts on this subject. Please feel free to reach out with any comments or concerns, and thank you for making me a super small part of your journey with the guitar, its something I don't take for granted! :)
True bypass pedals are the best way to preserve the tone of your instrument and your amplifier, with as little coloration from your pedals as possible. If you are anything like the rest of the guitarists on the planet, chances are you spent a great deal of time and consideration, not to mention money carefully picking out the best sounding guitar and amplifier that you could afford and like the rest of us, you would like to preserve as much of that tone as possible. True bypass pedals will not colour the tone of your guitar when the pedal is disengaged.
Many of the best overdrive pedals on the market feature true bypass switching.
The problem with true bypass pedals comes into play when you consider some of the electronic properties of your guitar and its signal chain. If your guitar is passive (the pickup has no battery) it is a high impedance signal. High impedance signals are subject to tone loss through cable length. This means that the longer your cable is from your guitar to the amplifier, the more high end you will lose. Some sources will tell you that as little as 10 feet of cable is enough to cause a perceivable loss of high frequencies, others will tell you it's more like 18 feet. In any case, if you consider how much cable you run from your guitar to the amplifier at even a small venue, it really starts to add up. If you use just one true bypass overdrive for example, but you run a 20 foot cable from your guitar to that pedal and another 20 foot cable from the pedal to the amp, that's 40 feet of cable. Now consider how much cable is in your pedalboard, and it starts to put the real magnitude of this issue into focus. Additionally, all of this cable will not only reduce high frequencies, it will also introduce noise into the signal chain.
There are variables here to consider. Higher quality cables will lose less tone and introduce less noise, and certain venues will also affect noise differently, but the loss of tone and introduction of noise is inevitable with nothing but true bypass pedals.
Virtual guitar lessons are a really fantastic way to learn to play guitar, but they come with one major setback;
If a brand new student comes to their first lesson with a guitar that's wildly out of tune and they don't know how to tune it themselves, I can pretty much guarantee that we will spend our entire first lesson trying to tune the instrument together over Skype or Zoom, and there are far more valuable ways to spend our lesson time together. Additionally, while many in person lessons and online courses will cover how to tune, it will save you lesson time and set you up for a better learning experience if you're able to tune your guitar on your own before you sit down for your first lesson.
Q. When Should You Tune Your Guitar?
A. All the time. Guitars go out of tune constantly, and there are many reasons why. Most guitars are made out of wood, which absorbs water. This means that changes in humidity can affect the wood, putting your guitar out of tune. Also, guitar strings are made of metal or sometimes nylon, neither of which like to be pulled tightly, and brand new strings tend to resist to the tension differently over time and can even rust or collect dust particles causing the instrument to go out of tune. All of this means that your guitar sitting alone by itself is going out of tune slowly as we speak. During a 45 minute performance, I might tune my guitar a minimum of three or four times.
Q. What Do I Need To Tune My Guitar?
A. There is an endless amount of products designed to help you to tune your guitar that range in price from absolutely free, to completely unaffordable.
For Free:
The best free product for tuning your guitar is an app called Guitar Tuna. This app is really user friendly and can be downloaded to your phone. It works by using the microphone in your phone to listen while you play one string at a time. It will listen to the note, and tell you by using an easy to understand display if that string is in tune.
Check out this video by the folks at Guitar Tuna to learn how to use the app in more detail:
Click Here to download Guitar Tuna in the Apple Store
Click Here to download Guitar Tuna in the Google Play Store
Electronic Tuners:
There is an entire marketplace of electronic tuners that you can check out, and if you'd like to learn more about what's out there you can check out this article (written by me) that goes into depth about the different tuners at different price points.
If you don't really care about all the gory details and all you want is a decent tuner that won't break the bank that you can use on an acoustic or electric guitar and that won't be trash next week, my advice is to check out these products here:
All of these products have a similar user interface to the Guitar Tuna application, however the advantage of the above products over the app is a higher degree of accuracy due to the fact that these clip on tuners read the vibrations of your guitar rather than relying on a cell phone microphone, which can be interfered with by noisy surroundings.
Q. How Do I Actually Tune My Guitar?
A. When you tune your guitar, you are making sure that the strings on your guitar are actually producing the pitch that they are supposed to produce. If they are, all your chords and music will sound the way that they are supposed to. If they aren't, even if you're playing perfectly everything will sound bad. The open (open means no frets pushed down) strings are supposed to produce these pitches:
It is important to understand that these pitches exist on a spectrum, similar to the way that colours do. That spectrum is called the "Chromatic Scale". The chromatic scale consists of these notes:
A (A# or Bb) B C (C# or Db) D (D# or Eb) E F (F# or Gb) G (G# or Ab) A
If you're trying to tune your low E (your thickest string) and you are using some sort of electronic tuner whether its a phone app or an actual physical tuner, you want that tuner to show you an "E" on the display, and then you need to get the needle or meter to read in the dead centre. However, if your guitar is way out of tune, it may be reading a "D" or some other note. In this case, refer to the above notes of the chromatic scale. In our hypothetical example where our tuner is reading a "D" when we want it to read "E", you can see that "D" is two positions to the left of "E" on the chromatic scale. In order to make your tuner read an "E" on the display, you need to tune the string way up from where it currently is (close to "D"), go past "D#" (also called Eb) and then you will be at "E". Once the display is reading the correct pitch (in this case "E"), make sure the needle or meter is in the dead centre.
This process needs to be repeated for all 6 strings until they are all reading the pitch that they are supposed to, and they are all in the dead centre of that pitch.
Another thing that you should come into your first lesson already aware of is how to read guitar tabs. Guitar tab is a very simple form of notation that is specific to the guitar. This means that if you show guitar tabs to a pianist or a saxophone player, they will have no idea how to read it.
While guitar tab is really great for quickly showing students how to play certain chords or songs on the guitar, it is by no means a replacement for understanding how to read musical notation. This is because guitar tabs cannot communicate some of the finer details that musical notation is able to, including how loud or soft to play something, or even how long to hold a certain note or chord. Due to the fact that guitar tabs cannot communicate this kind of information, guitar tabs can only show you how to play a song that you are familiar with. If you've never heard the song before, guitar tabs can give you some idea of how to play it, but you will need to actually listen to the song to get it right.
What Guitar Tabs Look Like
Here is an excerpt of a song written out using guitar tabs:
You can see that there are six horizontal lines. Each horizontal line represents one of your guitar strings.
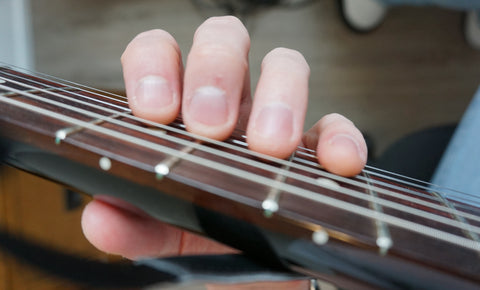
The bottom line represents your thickest string (your low E) and the top line represents your thinnest string (your high E). If this looks a bit backwards to you, you are not alone. The idea behind it is that when you look down at your guitar, the first string you see is your low E, like this:
How To Read The Numbers
The numbers simply tell you what fret to hold down. The particular line that they are written on indicates what string to hold the fret down. The only other important consideration is that when the numbers are written one after the other, as in the example above, they are intended to be played in succession, or one after another. If the numbers are written in a vertical line on top of each other as in the example below, they are meant to be played simultaneously, as a chord.
Now that you're up to speed on these two pre requisites, you're ready to start your lessons! Thanks for checking out what I have to say on this subject, and as always thank you for making me a super small part of your journey with the guitar, it's something that I do not take for granted!
If you have any questions or concerns, feel free to reach out to me any time :)
This week I wanted to go into a little more detail in discussing how to change the tubes in your amplifier. First, how would you even know if your tubes need to be changed? Second I'd like to talk about buying "matched" sets of tubes and what that means, and finally I want to talk about what it means to "bias" your tubes and whether or not that's something you can do at your home with some simple tools.
As I mentioned in last week's article, vacuum tubes are pretty old technology. Two tubes of the same make and model are liable to have very different performance characteristics. It is important to make sure when you're replacing the tubes in your amp that each new tube you're putting in to the amp has consistent amplification characteristics. Many vacuum tube manufacturers will test the plate current draw as well as other amplification characteristics of each of their vacuum tubes and then group together ones that have the same measurements for sale as "matched" sets.
All of the tubes in the above links are sold as matched sets, and it is common to walk into a guitar shop and see tubes for sale in bundles sometimes bound together with rubber bands to indicate a matched set. It's important to have matched sets of tubes in your amplifier so that when you "bias" your amp once the new tubes are put in, each tube will behave the same way. If the tubes are unmatched, settings that are great for one tube may be terrible for another.
Thank you once again as always for checking out my blog today, and for letting me be a super small part of your journey with the guitar. It's a privilege that I do not take for granted.
If you have any questions or concerns, please feel free to reach out!
All of the negative aspects of owning a tube amp have to do with pragmatic concerns. For instance, tube amps tend to be more expensive than solid state amps. That said, in more modern times many of the digital solid state amps on the market are beginning to challenge that norm. Systems such as the Kemper or the Helix by Line 6 or even Axe FX can be more expensive than a decent tube amp.
Tube amps are often heavier than solid state amps. This can be difficult for gigging musicians who often need to take their equipment up a flight of stairs to get to the stage, or for anyone who has ever lived in an apartment.
Another con is that tube amps are fragile. Glass tubes are liable to shatter if the amp is dropped or carelessly handled. Tubes also need to be replaced after a certain amount of regular use, and replacing them involves a process known as "biasing" the tubes which can be challenging to anybody who has little experience with working on electronics. Tubes can also break in the middle of a gig (although its rare if everything has been set up correctly). For this reason, anyone who owns a tube amp must eventually incur the cost of replacing tubes.
There are lots of brands to choose from, but I usually buy JJ Electronics tubes because I've found them to be very reliable and long lasting. When you're replacing your tubes, you need to make sure that you purchase the correct model of tube for your amplifier. The three above models are all 12AX7 tubes, which is an extremely common preamp tube. You need to check and make sure you know how many pre amp tubes you need, and double check that they are 12AX7's. Preamp tubes usually do not need to be changed as often as power tubes.
EL84 power amp tubes are a common model, known for their use in Vox AC30 and AC15 models, as well as the Fender Blues Jr.
EL34 power amp tubes are often associated with the "British" sound. These model of power tubes can be found in Marshall amps such as the JCM800 and JCM900 as well as other British amps by Orange and Hiwatt.
6V6 power tubes have been often associated with the "American" sound, and can be found in many popular Fender amp models including the Deluxe Reverb and the Champ.
Make sure when you're buying tubes to buy the correct amount that you need for your amp as well as the correct model of preamp and power amp tubes.
The only thing you'll really need to clean your volume and tone pots is a product called "contact cleaner". Contact cleaner is designed to clear off all of the dust and residue without leaving behind any sticky film. This is why most guitar techs will advise you to use contact cleaner and NOT WD 40, as WD 40 is a lubricant and will leave oil on your potentiometer. This can cause dust and particles to stick to the pots more easily, meaning you will just need to go back and clean the pots again sooner than is really necessary. The most widely used contact cleaner is called CRC contact cleaner, but many techs also use something called DeoxIT. I've included a link to both products here.
For additional accuracy and to reduce overspray, StewMac makes a pot cleaning cap. To use this cap, simply place the cap over your potentiometer and connect the cap to the small tube, which should connect at the other end to the nozzle of the contact cleaner. This will ensure that your pot is cleaned as efficiently as possible, without wasting any of the contact cleaner by spraying it all over your control cavity.
The electronics inside a passive guitar are fascinating. Compared to all the other pieces of modern technology we carry around and use every day, guitar circuits are very primitive. Yet often, it is their simplicity that bares some of the most intriguing complications.
All you will really need to attempt to wire a treble bleed circuit into your guitar is a soldering iron and some free time. If you're like me and you're not the most confident at soldering then I would recommend not buying the cheapest option, because those can take more skill to use effectively. Something like this would work very well:
The most simple type of treble bleed circuit involves wiring a capacitor in between the input and output lugs of your volume potentiometer.
This type of circuit has been used by guitar manufacturers such as G&L and PRS in the past. It was originally made popular by Fender in the 1960's. Fender used 1000 pF capacitors in conjunction with 1M pots. G&L has used 200 pF capacitors, and PRS has used 180 pF in these type of circuits.
The capacitors in this set are 1000 pF and can be used to wire this type of treble bleed circuit into your guitar.
One disadvantage to this style of treble bleed circuit is that as you roll your volume down, this circuit can disproportionately allow high frequencies to pass through creating a tinny or thin sound. While this may be ideal if you are using a particularly dark sounding amp or play with long instrument cables, it can also be undesirable in certain contexts.
The second type of treble bleed circuit introduces a resistor wired in parallel into the original circuit above.
This treble bleed circuit allows for the tone to be much more even across the rolloff of the volume control. This is a very popular circuit, found in many guitars these days. A very common size for the components in this particular circuit is a 1000 pF capacitor matched with a 150k ohm resistor.
This pre wired 1000 pF capacitor with 150k resistor in parallel can be soldered onto your volume pot to create this second style of treble bleed circuit.
One disadvantage to this type of treble bleed circuit is that it is very important to use the correct capacitor and resistor values for your guitar. While a 1000 pF capacitor with a 150k resistor is often used as a one size fits all approach, it may not be right for every guitar through every amp. If it isn't the best fit, the taper of the volume pot can be negatively affected and may not be as smooth as it could be.
The third type of treble bleed circuit involves wiring a resistor into the original capacitor only circuit but this time in series rather than in parallel.
This third type of treble bleed circuit is often considered to be the best, and was popularized by a luthier in the 90's named Chris Kinman. Kinman used values of 1200 pF for the capacitor, and 130k for the resistor. Fender uses a similar circuit in their modern "Tone Saver" treble bleed circuit included on the American Professional series of guitars.
This circuit solves the issue of tinny tones at low volumes in the capacitor only treble bleed, and it also solves the issue of un natural volume taper from the resistor in parallel circuit. The only real disadvantage for this circuit is that the ratings of the capacitor and resistor used must be correct. While the sizes used by Kinman are sometimes considered a one size fits all sort of approach, it may not always be the ideal choice for every guitar.
Sets of capacitors and resistors like this one can be great for wiring up your own treble bleed circuit, and it is important to experiment to find what you want. Try soldering two long wires to the input and output lugs of your volume pot respectively, and then attach alligator clips to the end. This way, you can easily switch between not only different treble bleed circuits, but also different capacitor and resistor values. Start by trying out some of the conventional ratings mentioned here, and then experiment until you find the size that's right for what you need.
Thank you as always for checking out what I have to say about treble bleed circuits. It means a great deal to me that I'm a little tiny part of your journey with the guitar, and it's something I will never take for granted.
Take a look at Guitar Center's Daily Pick for some great deals on killer gear by clicking the link right here:
First, you need to open up your control cavity and remove all of the components, and remove the pickups as well. For the love of God, take a picture of your electronics or make notes or do something before removing everything so that when you are putting everything back, you put it back in the right place and wire it all back up correctly.
Now that you're looking at a totally empty control cavity and pickup routes, you need to cover the inside walls with adhesive copper foil.
This copper foil will make things much easier because the adhesive is also conductive. If the adhesive side is not conductive, you must ensure that the conductive side of the tape is always contacting the conductive side of the next strip of tape, which can be a challenge. Using copper tape with conductive adhesive means all you need to do is totally cover every inch that you can of your control cavity, pickup routes, input jack route, and pickup switch route. Be sure also to cover the backside of any surface that contacts those cavities such as the backside of your pick guard on Telecaster or Stratocaster style instruments, or the backside of the control cavity cover and pickup switch cover on Gibson style instruments. It's important to make sure that the tape placed on cavity covers or pick guards will make contact with the tape placed inside the cavity once it is closed up. This can be done by putting a small lip of tape over the top edge of every cavity.
Next, you will need to run a wire between every cavity that is covered in copper tape. To do this, it is a good idea to use 22AWG copper wire.
To run wire between all the shielded cavities of your guitar, you realistically need around three meters of wire. This set here is 12 feet which should cover you, and is push back wire, meaning you will not need wire cutters to expose the edges of each wire. Once these wires have been cut and put into place, solder the ends to each cavity, connecting all the cavities to each other.
Once all the wires have been soldered, the next step is to check for connectivity between all of the cavities. To do this you will need a multimeter.
Place one end of the multimeter inside one of the cavities, making contact with the copper tape and place the other end inside a different cavity making contact again with the copper tape. If the multimeter registers a reading, this means that there is connectivity across both of those cavities, and your faraday cage will function correctly. Repeat this test again testing for connectivity across all cavities. If everything is connected properly and registering a reading, you're doing great! If not, make sure that your wires are soldered correctly and try again.
Now, you can reconnect all the electrical components of your guitar, and close up all of the cavities!
If you're more of a visual learner, check out this video here. This guy does a really great time lapse video of himself shielding a Telecaster style instrument and his comment section is very helpful if you have questions about what he's doing.
Thank you so much for checking out my thoughts on how to shield your guitar! I want you to know that I really appreciate being a small part of your journey with the guitar, and if you have any comments or questions please feel free to reach out!
I think its safe to say that most guitarists today are familiar with the iconic Gibson headstock design, with its trademark "moustache" carve and 3 strings each side. I myself am the proud owner of several Gibson guitars that bear this headstock. However, it is an open secret amongst guitarists that this headstock design is deeply flawed. And while I myself am certainly no luthier, I thought it might be fun today to talk about the two major issues that have plagued Gibson headstocks since some of their earliest instruments.
Perhaps the least egregious of the two major issues, the Gibson headstock design creates a problem involving the D and G strings on their guitars. Due to the positioning of the tuning pegs, the D and G strings exit the nut at a pretty sharp angle.
You can see in the image above that while the two E strings, the A string and the B string all pass through the nut and remain relatively straight as they head into the tuning peg, the D and G turn a fairly sharp angle after the nut to get to the tuning peg.
In terms of playability, this issue can make keeping your guitar in tune somewhat complicated. What tends to happen is that when you bend a string on either the D or G strings, the sharp angle after the nut leaves a very low probability that once you release the bend, the same part of the string will sit in the nut as was previously there before the string bend, putting you out of tune.
Another complication is that when you're tuning your guitar, if your string is too sharp and you're moving the pitch downwards, the sharp angle can cause the string to get a little bit "caught" in the nut. When this happens, you might think you're in perfect tune because a chord sounds great or the tuner is reading that the pitch is correct, however the moment you fret the string that is caught, or god forbid you should bend it, the note will become "un-caught" by this movement and once you un-fret the note or release the bend, the note will be very noticeably flat.
Now it's time to talk about the more serious issue with the Gibson headstock design; The angled headstock. Let me set the scene with a little bit of background information. Every guitar that is built correctly must have a steep enough downward angle, known as a "break angle" after the nut and going into the tuning pegs that the string will work properly and stay inside the nut while it is being played. Over the years countless luthiers have engineered a variety of solutions for this problem but as I said in the opening, I am not a luthier. So let's stick to the basics. Fender's solution to finding a break angle is simple. After the nut, the headstock is thinner and sits lower that the fretboard. Then, to confirm the proper break angle most Fender guitars use "string trees" on their headstock. A string tree is a simple little "T" shaped piece of hardware, under which the strings are held after the nut on the headstock.
I'm sure that if you were to consult somebody who is an expert in building guitars they would tell you that Fender's headstock design has it's own problems and is far from perfect. That said, I've never experienced any problems with them, nor have I ever met anybody who has told me a horror story about something going wrong with them.
Gibson's solution to the "break angle" problem is arguably more aesthetically elegant, but as I will explain, has proven to be pretty problematic.
Due to the fact that there are 3 tuning pegs on a side instead of all 6 on one side the way that Fender does, Gibson guitars do not need string trees. Furthermore, the way that they achieve the correct break angle after the nut is by angling the headstock back after the nut.
This makes for a really beautiful looking guitar design, however there is a fundamental and significant flaw. This angle creates a weak point in the neck right where the neck and headstock meet, and the angle begins. All through their history Gibson guitars have been plagued by headstocks breaking from even the most mundane of occurrences. A quick google search will reveal endless horror stories involving Gibsons falling off of guitar stands and snapping off at the headstock, or people leaning their instrument against their amp at a gig only to return to it having fallen over and the headstock broken off, or even buying a brand new guitar only for it to arrive broken in the case at the headstock.
At different points in time, Gibson has tried to introduce solutions to this issue. The most interesting fix I've seen is called a "volute". This is a little piece of mass added at the joint between the neck and the headstock that gives some support to the otherwise weak point.
I have seen volutes added to Gibson 335's as well as SG's, but I'm not sure what year these were put on, and also I have no idea why they didn't make this kind of thing regular practice going forward.
Honestly, the best solution that I've found to protect your fragile Gibson headstock is by investing in a great guitar case. These days Gibson has become pretty good at case building themselves, so if your guitar came with a heavy duty Gibson hardshell case, I bet that will do the trick. That said, some Gibsons are still sold in gig bags, and those things will definitely not protect that neck joint.
The best option I've found where practicality meets with high quality manufacturing is Mono cases.
I've flown with my Gibsons many times using a Mono case and I've never had an issue with them!
In my opinion, this dual case is the best because as the name would suggest, it can hold two electric guitars at once. Their cases are built in such a way that the headstock is suspended and well protected, which is the best thing you can do proactively about the weak neck joint on Gibson guitars.
If your Gibson headstock does snap or break off at some point, know that it can absolutely be repaired. This sort of repair shouldn't affect the overall tone or the quality of the instrument in any major way, but if you are lucky enough to own a vintage Gibson and the headstock is damaged, it can affect the resale value of the instrument.
Thank you for checking out my thoughts on the design flaws of the Gibson headstock! As always, it is my privilege to be a small part of your journey with the guitar!
Take a look at Guitar Center's Daily Pick for some great deals on gear by clicking this link right here:
Single coil pickups can be found on some prevalent Fender style instruments, such as Stratocasters and Telecasters. Single coil pickups use an incredibly simple design to convert the vibration of the strings into an electrical signal. Six magnetic poles (one for each string) are wrapped thousands of times with copper wire. When companies producing single coil pickups were young and still small, this was done by hand, producing a wide margin of error for the actual number of total winds from pickup to pickup. This variation in the amount of winds created a very inconsistent frequency response as well as output level between single coil pickups and today, most pickups are machine wound to ensure a higher degree of consistency. When these magnetic poles are wound with copper wire, a cartioid (heart shaped) magnetic field is created. The vibration of the metallic guitar strings creates a disturbance in this magnetic field, which is translated into an electrical current that runs through the copper wiring, and to the output of the guitar. A more aggressive string vibration (caused by more aggressive playing) results in a stronger disturbance of the magnetic field, and therefore a stronger electrical current resulting in a louder sound through the amplifier, and a lighter vibration creates a weaker electrical current and a softer sound through the amplifier.
Today, there is an endless quantity of single coil pickups on the market. They vary in tone, frequency response, and output level to suit whatever your needs might be. Are you worried that the bridge pickup in your Stratocaster is too thin? Perhaps an overwound set of Texas Special pickups is what you need.
Tube Screamers contribute their own distinct tone to your signal, but they also push the front end of your amp (hence the name) and if you often play with your volume at a mid to high level on your amp, tube screamers can be the perfect way to achieve an over driven lead sound without sounding like a heavy metal guitarist.
The Ibanez TS 808 is really the gold standard of tube screamer pedals. If you're in the market for a tube screamer, you may notice that many different models are green in colour, or perhaps they have the same three knobs as the TS 808. This is because the TS 808 circuit has been imitated and even improved upon by many different pedal companies. If you're wondering how this pedal sounds, think Stevie Ray Vaughan. He famously ran two of these pedals in his signal chain. Since its release, the TS 808 has been discontinued, reissued, reproduced in hand wired versions, released as anniversary editions, and repackaged in just about every conceivable way. Vintage models or hand wired versions can be much more expensive, but for me the reissued version is one of the best gigging pedals I've ever used.
More so than clean drives or tube screamers, distortion pedals impose their own tone onto your signal and have less of a tendency to give the sound of your amp being "pushed". Distortion pedals can add gain or drive to your tone much easier and at lower volumes than tube screamers, and are often used for rhythm guitar parts that need to be overdriven.
The BOSS DS 1 has been a popular choice for guitarists for decades. Kirk Hammett has famously relied on this pedal to produce some of the well known overdriven sounds of Metallica's catalogue. While this distortion has been a staple for many guitarists, it has always remained on the more affordable end of the price range for comparable pedals, which makes it a smart buy for the money.
Similar to reverb, delay effects can create the illusion of distance in a mix, and adding it in or taking it away can change the way your guitar fits in with a band. Ever since the introduction of massive tape delay units such as the Roland space echo, whose praises can still be heard from the mouths of true analog purists, delay effects have become an essential component of any modern guitarist's tone.
Guitar icons from Jimi Hendrix to The Edge have pushed the delay pedal into the library of required reading for any guitarist with even a half hearted interest in advancing. That said, not all delays are created equal. Many of the delay effects on the market today boast an ever widening array of features, and understanding what exactly some of the most substantial differences are can help you to make informed decisions towards understanding what kind of features are most important to you for your own purposes.
One of the clearest distinctions between certain types of delay effects is analog delay vs digital delay. To be perfectly blunt, unless you're using an actual rack mounted tape delay unit with magnetic tape on reels, any modern delay pedal marketed as analog is really just a digital recreation of what an analog delay would sound like. Nevertheless, the difference is still important.